Toolbar Menus
The toolbar menus in XR Editor Studio provide essential options for project management, element creation, object transformation, and scene publishing. Below is a breakdown of each menu and its functions.
First Dropdown Menus

The first row of dropdown menus allows you to save, edit, preview, and publish your project.
Project Menu
Manage your project files, save your progress, and publish your work.
- Home: Returns to the XR Editor main page where all your projects are listed.
- Save Project: Saves your current changes without publishing.
- Publish: Creates a Verse, generating a unique URL to share or create portals.
- Import Project: Loads a .xrproj file containing a pre-existing scene with all its assets.
- Export Project: Saves your project as a .xrproj file, useful for backups or sharing with others.
Edit Menu
Tools for modifying objects and managing actions.
- Undo: Reverses the last action.
- Redo: Reapplies an undone action.
- Select All: Selects all objects in the viewport.
- Duplicate Selection: Copies selected objects.
- Focus Selection: Centers the camera on the selected object.
View Menu
Controls how panels and the viewport are displayed.
- Open or close panels such as Properties, Assets, Console, and Hierarchy.
- Change the editor layout or enable full-screen mode.
Run Menu
Options for testing and analyzing your project.
- Start Preview: Simulates your scene as it will appear in the metaverse.
- Health Check: Analyzes project performance and detects optimization issues.
Help Menu
Access tutorials, documentation, and support.
- Keyboard & Mouse Controls: View a list of controls.
- Get Support: Contact the support team for assistance.
- Documentation: Opens the full XR Editor documentation.
Version Control and User Menu

On the right side of the top toolbar, you’ll find the Version Control button and the user menu.
- Version Control icon: Opens or focuses the Versioning panel.
- User menu: Provides quick access to appearance preferences, bug reporting, and logout options
Elements Menu
Elements are the building blocks of your XR scene — from 3D models and media to lights and interactive objects.
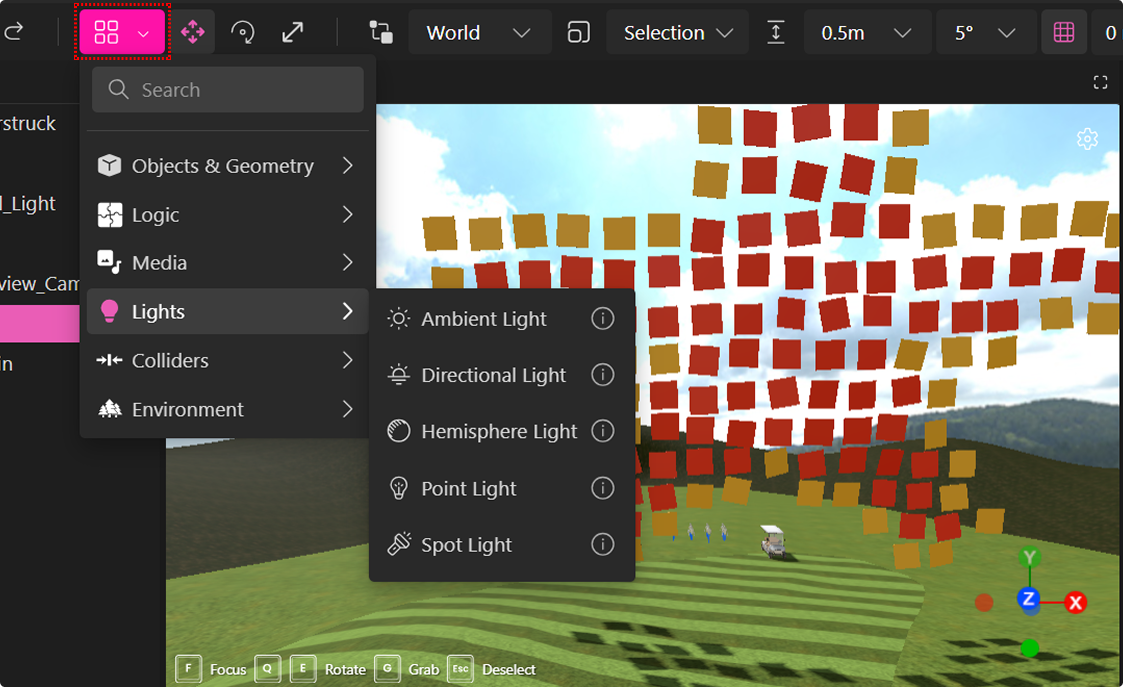
Objects & Geometry
- Group: Combine multiple objects for easier manipulation.
- Ground Plane: A large flat surface for building scenes.
- Model: Add 3D models (GLTF or external links).
- Primitive Mesh: Basic geometric shapes such as cubes, spheres, and cylinders.
- Spawner: Creates an interactive model that users can duplicate.
Logic
- Behavior: Add custom scripts to extend project functionality.
- AI Agent: Load an NPC Agent with interactive properties connected to OpenAI.
- Audio Zone: Affects audio properties within a 3D area.
- Persistable: Unstructured data store for sharing data between scene elements and across devices.
Media Elements
- Audio: Loads and plays an audio file (set the URL in properties).
- Image: Dynamically loads a 2D image.
- Link: Adds an external URL, scene, or portal link.
- PDF: Loads a PDF document into the scene.
- Text: Creates 3D text elements with customizable fonts.
- Video: Plays a video file (set the URL in properties).
Lighting Elements
- Ambient Light: Evenly lights all objects in the scene.
- Directional Light: Simulates sunlight from a single direction.
- Hemisphere Light: Overhead lighting with environmental effects.
- Point Light: Emits light in all directions from a single point.
- Spot Light: Creates a focused beam of light, similar to a flashlight or spotlight.
Colliders & Interaction
- Box Collider: Creates an invisible surface that blocks movement.
- Media Frame: A frame where users can place media (images, videos, etc.).
- Nav Mesh: Defines walkable areas in the project.
- Snap Collider: Allows you to attach objects to predefined surfaces such as walls.
- Trigger Volume: Activates events when users enter or exit an area.
Environment Elements
- Mirror: Adds a reflective mirror surface.
- Particle Emitter: Creates particles like fire, smoke, or snow.
- Skybox: Controls background and atmosphere settings.
- Spawn Point: Sets where users appear when entering the scene.
- Waypoint: Defines a teleport point for user movement or seating.
- Water: Adds a realistic water plane to the scene.
Transformation Tools

Modify an object's position, rotation, and scale using these tools:
- Translate (T): Move objects along the X, Y, or Z axis.
- Rotate (R): Rotate objects in any direction.
- Scale (Y): Resize objects by dragging the scale handles.
- Grab (G): Move objects freely using your mouse.
- Cancel Grab (Esc): Cancels an active grab operation.
Grid Tools
The grid system helps align objects precisely.

- Toggle Transform Space (Z): Switch between World and Local coordinate modes.
- Transform Pivot (X): Adjust pivot points (Center, Bottom, or Selection).
- Toggle Snap Mode (C): Snap objects to precise grid positions.
- Adjust Grid Height:
- Increase Height (+)
- Decrease Height (-)
Rendering Options for Viewport

The Rendering Options allow you to fine-tune how your scene appears in the viewport.
-
Render Mode: Choose how elements are displayed. Options include:
- Lit: Full preview with lighting, shadows, and materials.
- Unlit: Preview without lighting or shadows.
- Wireframe: View only the mesh geometry.
- Normal: Visualize surface normal directions.
-
Settings / Viewport Overlays: Toggle visual guides, render statistics, and axis indicators to help position objects accurately.
-
Play Mode: Simulate scripts, play animations, audio, and video, and preview dynamic interactions in real-time.
Launch
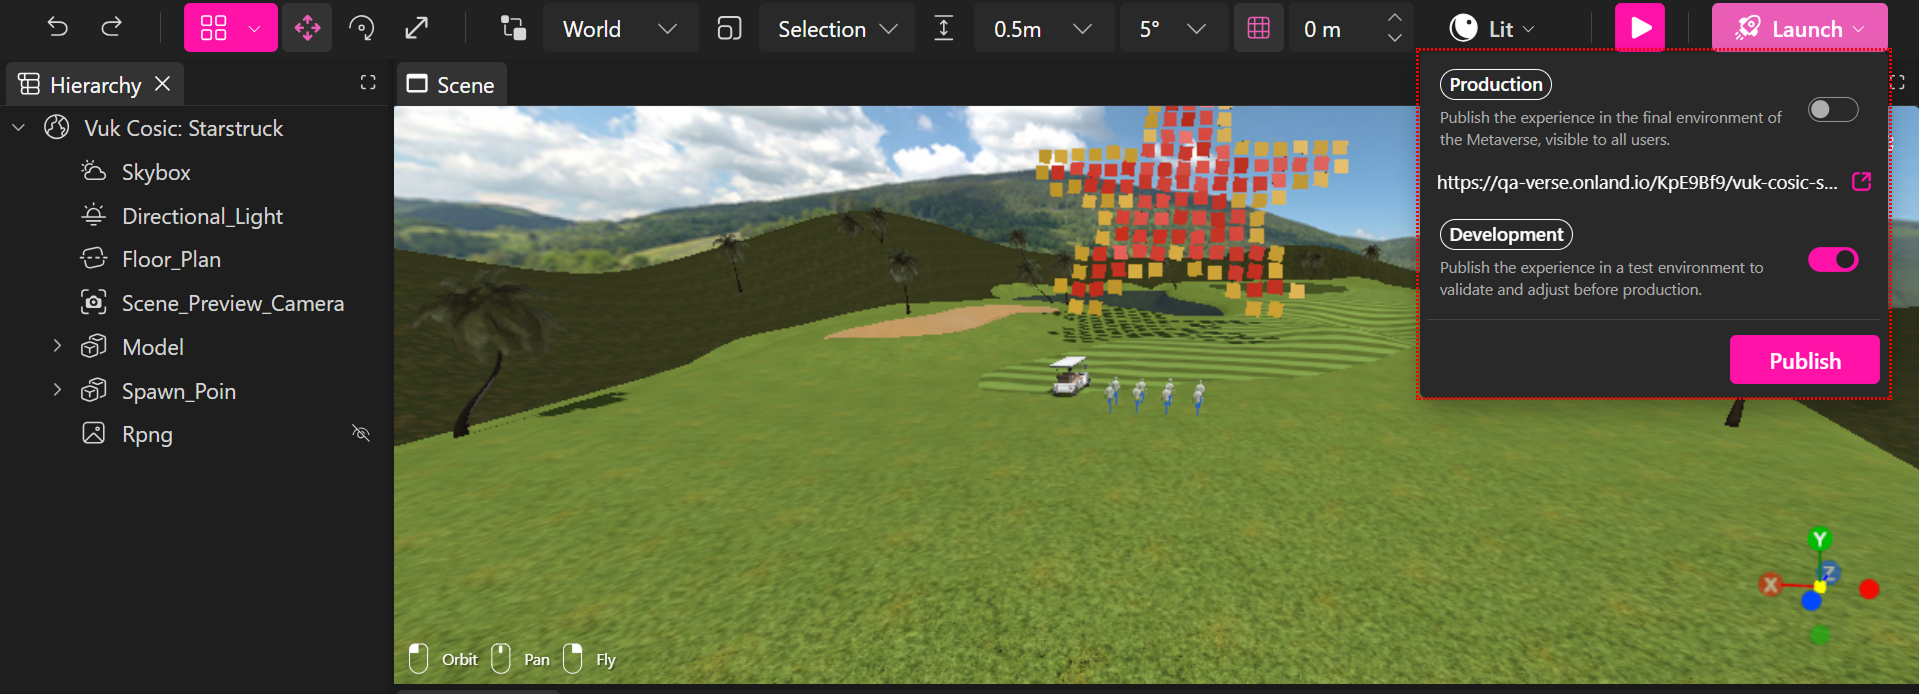
Use Launch to publish your project to the Metaverse. Clicking this button opens the Publish dialog, where you can choose how and where to deploy your experience:
- Production — Publish the experience to the live Metaverse, making it visible to all users.
- Development — Publish the experience to a test environment to preview, validate, and iterate before going live.
From the Publish dialog, you can review your scene’s details and generate shareable links for each environment.